
Titan Email User Guide
Once you have purchased Titan Email through NameMart, here is how to access your order:
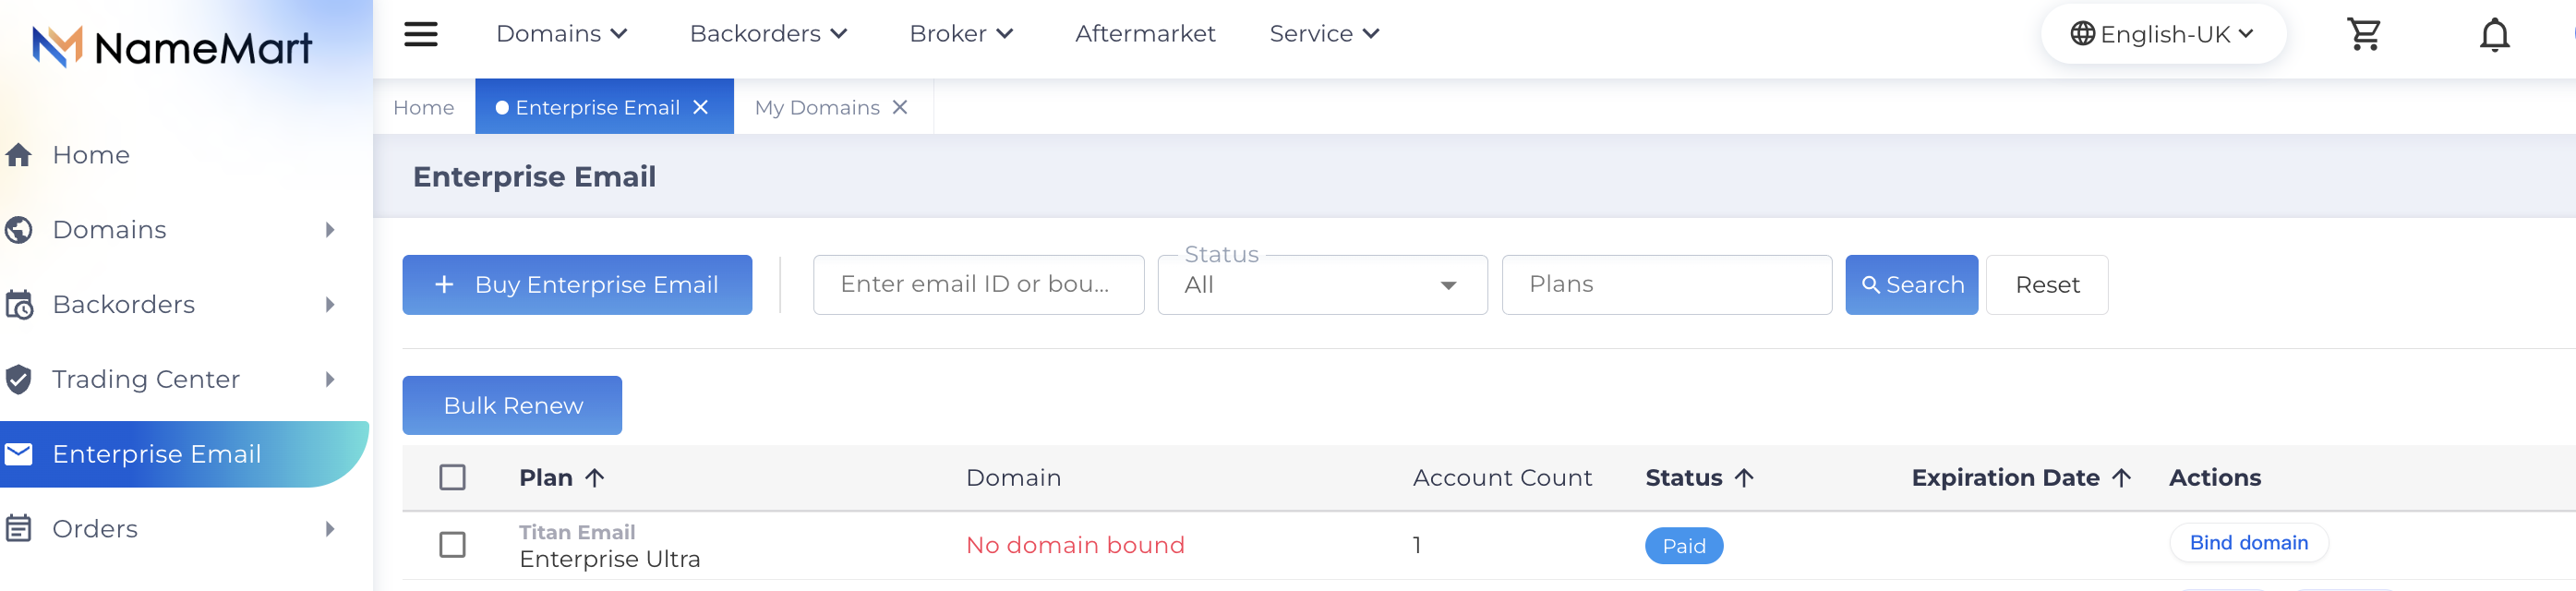
1. Log into your NameMart Member Center
2. Navigate to Enterprise Email
3. Select Titan Email from the Plans dropdown menu to locate your order
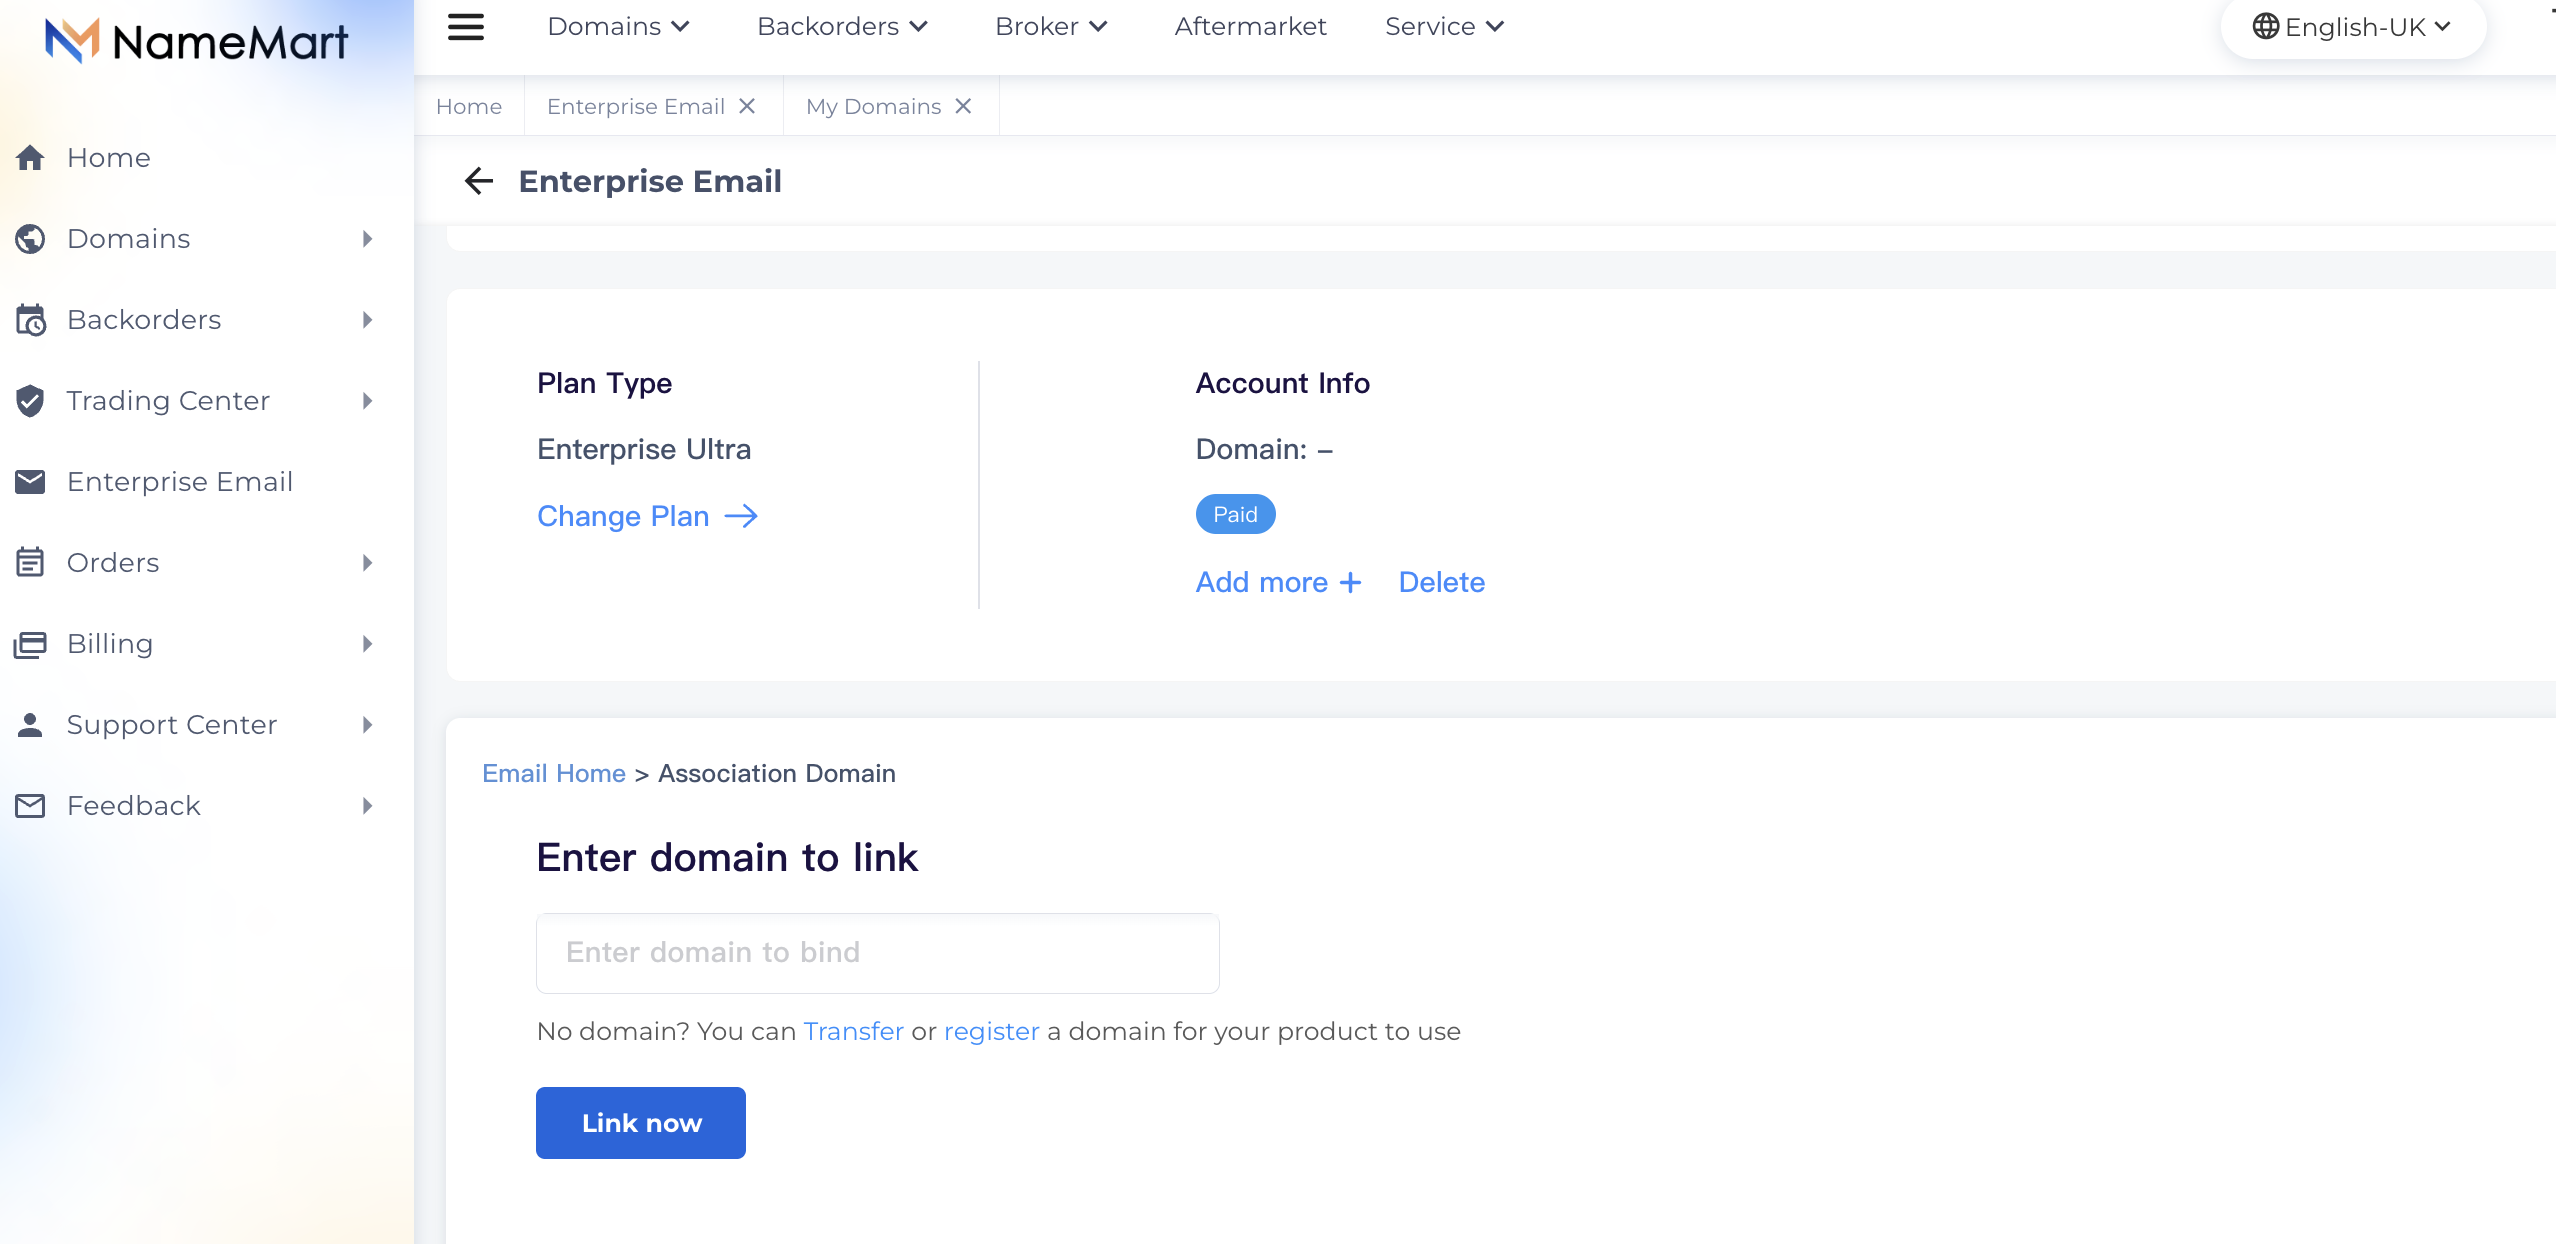
4. Click on Bind domain to connect your own domain.
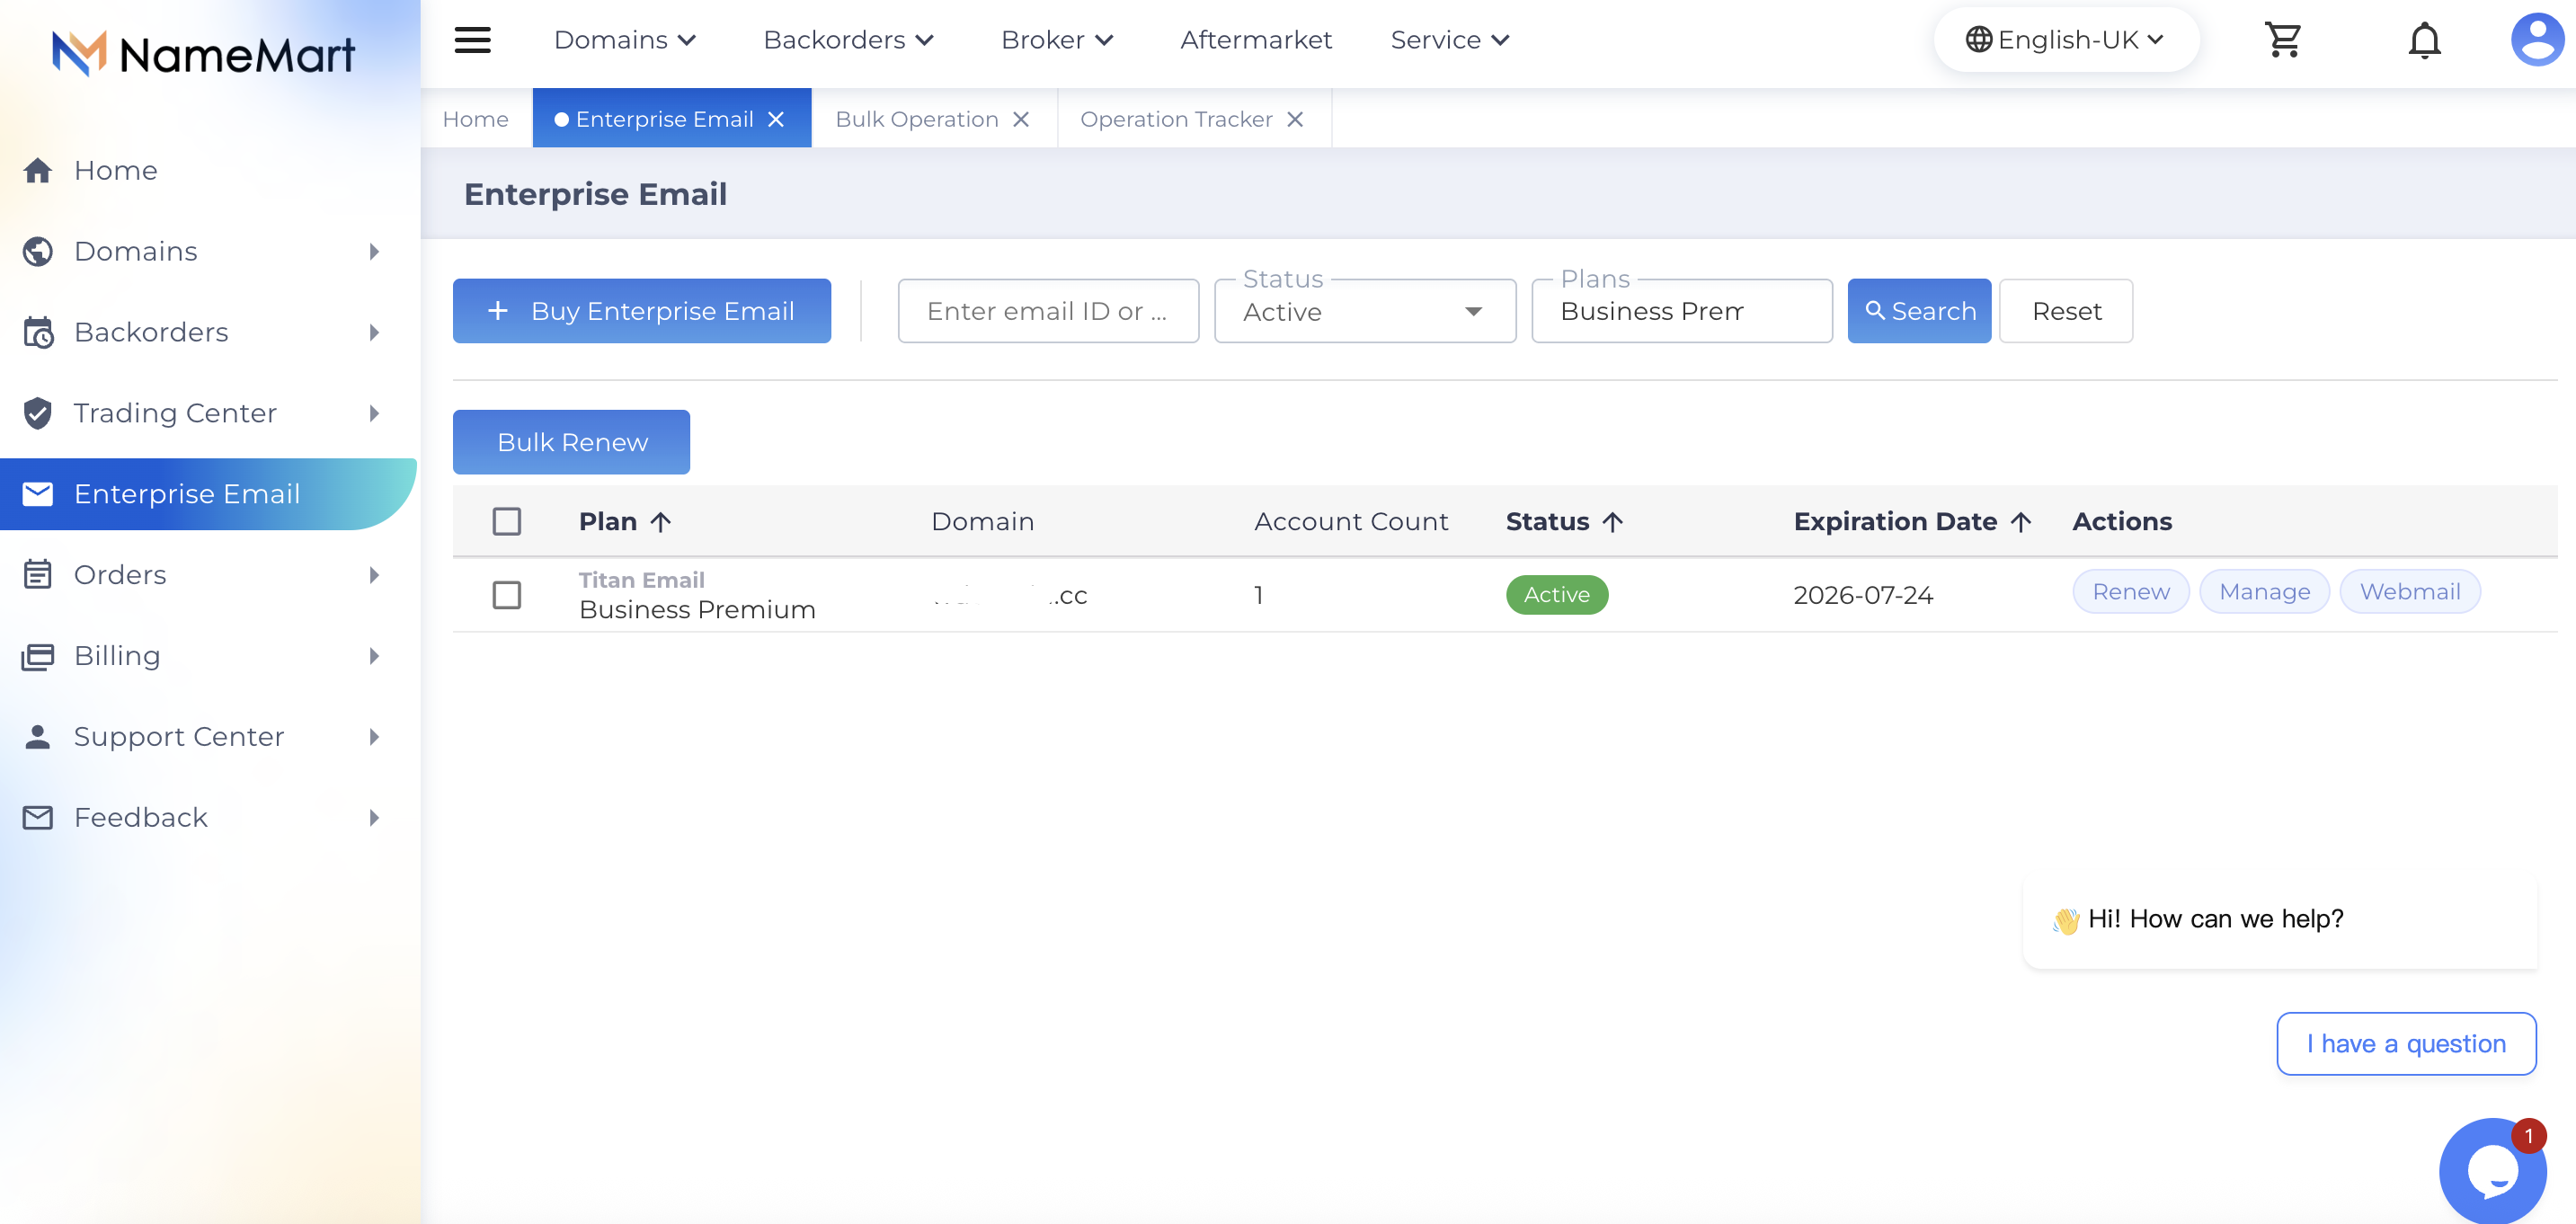
5. And then click on Manage to reach the Order Information view
Step 1: Configure DNS Settings
For your Titan Email to function correctly, your domain's DNS records must point to Titan's email servers. This is the most critical step—if DNS is not configured properly, you will not be able to send or receive emails.
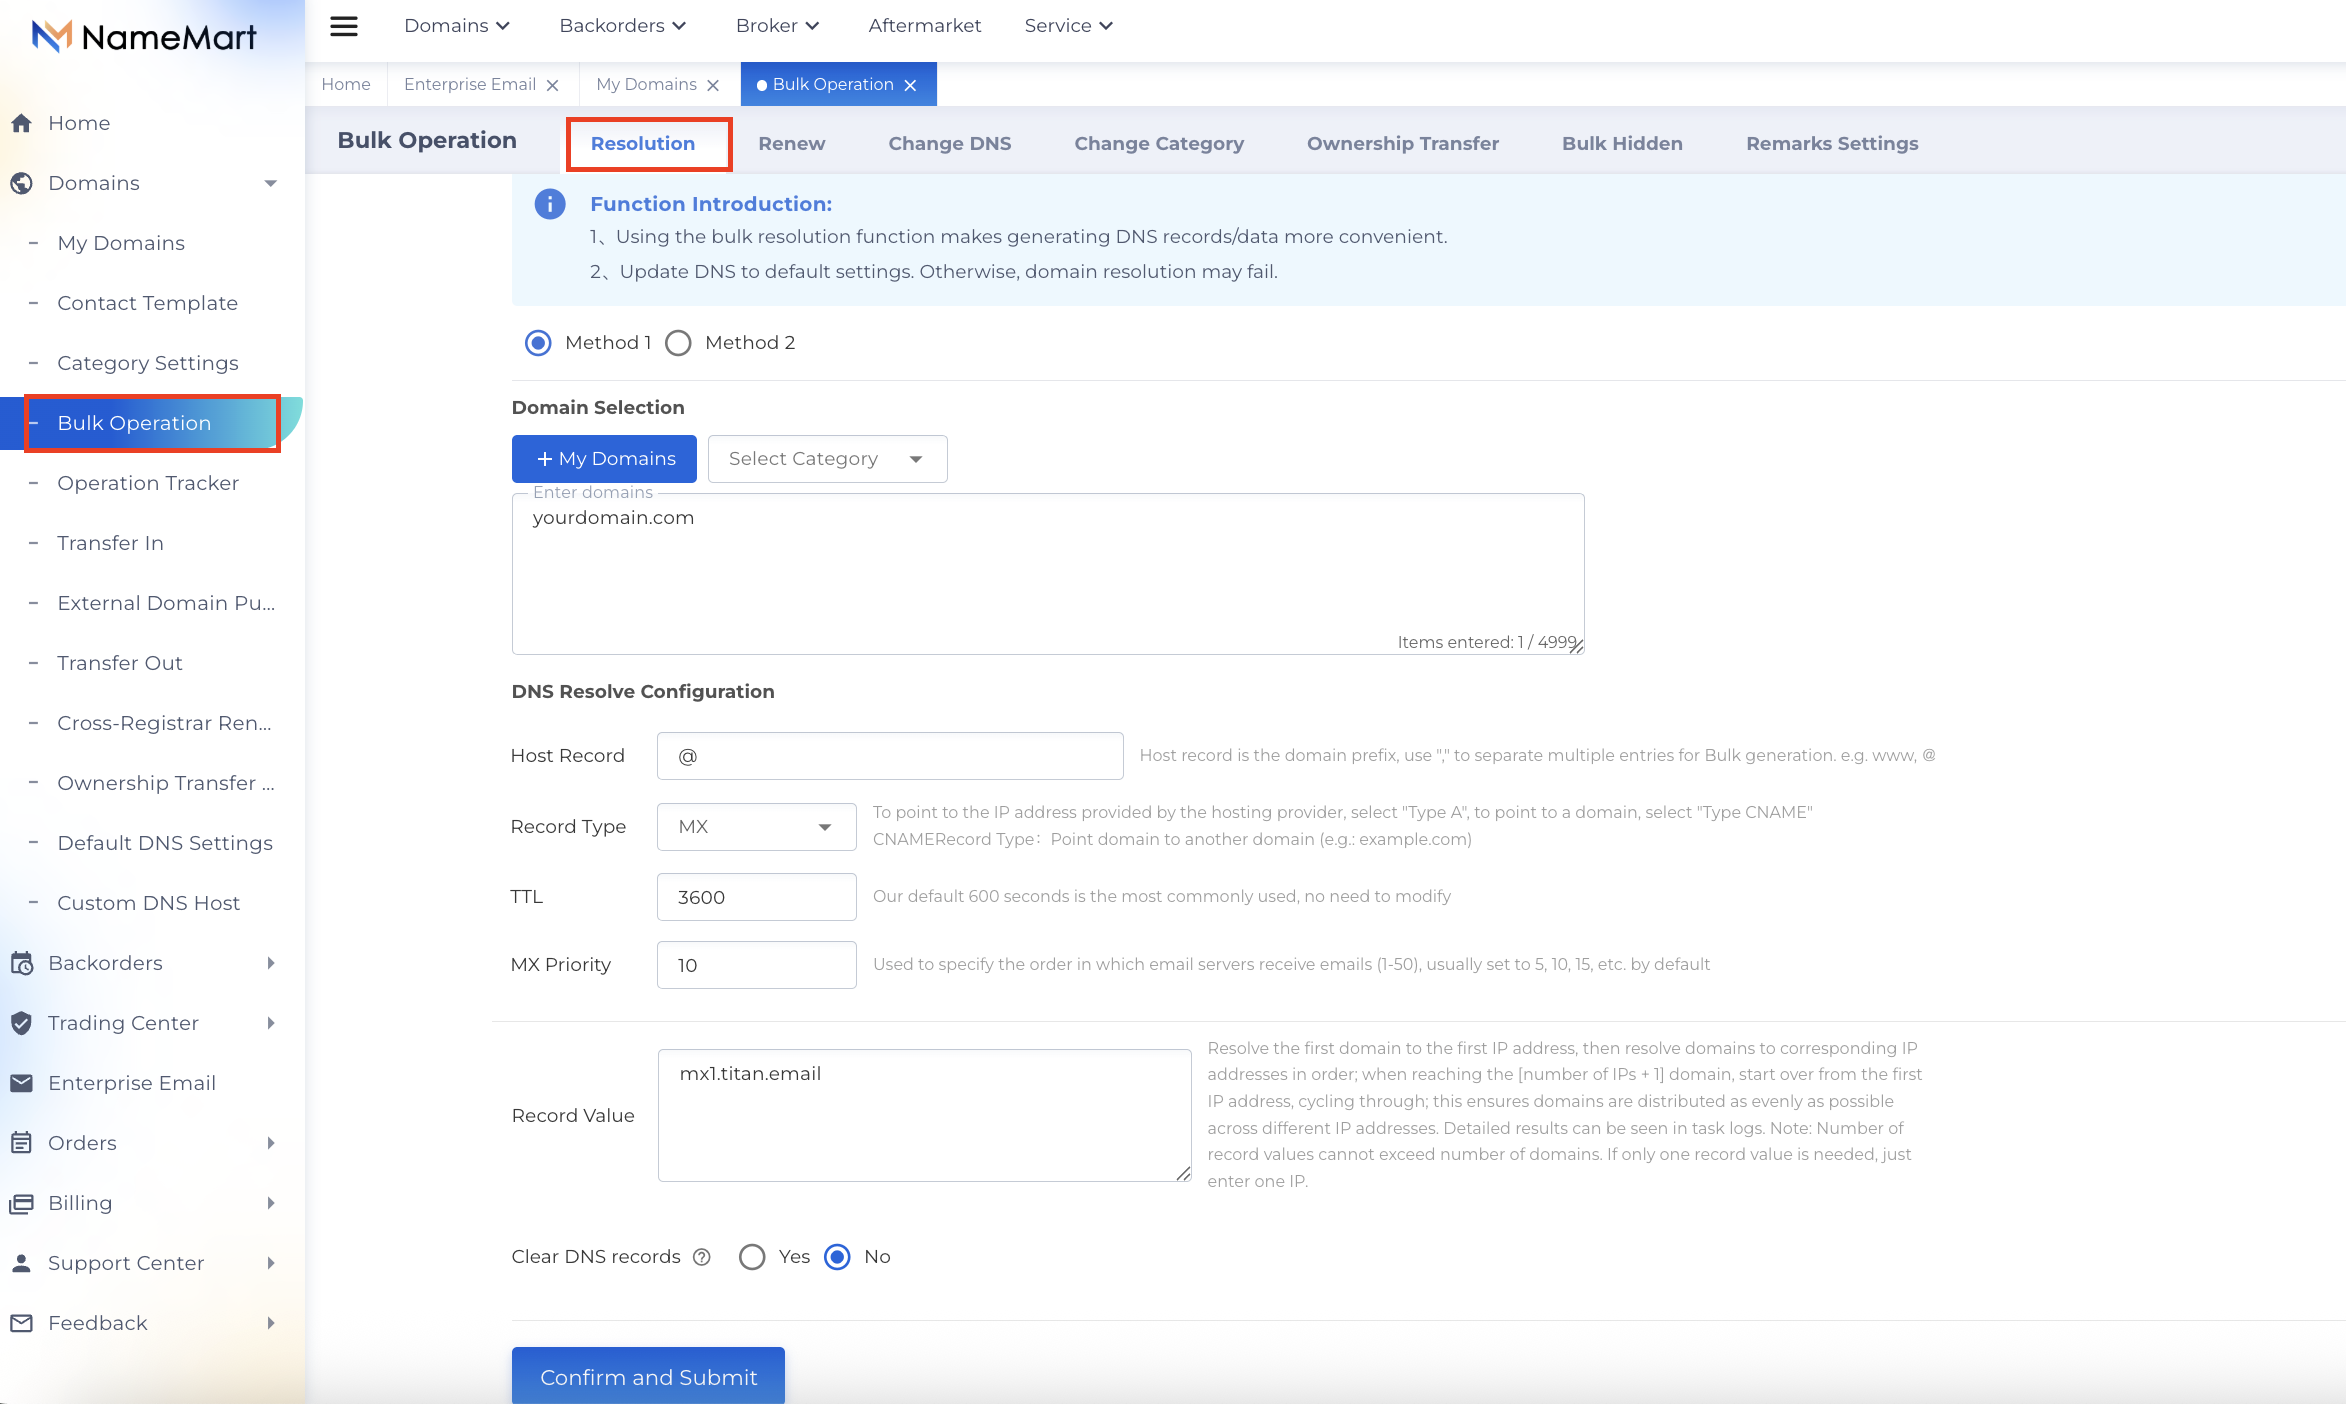
① Find the Bulk Operation option in the sidebar on the left-hand side and click on it.
Select Resolution and create your first MX record.
Record Type: MX
Host Record: @
TTL: 3600
Priority: 10
Record Value: mx1.titan.email
② Similarly, add the following values for the second MX record:
Record Type: MX
Host Record: @
TTL: 3600
Priority: 20
Record Value: mx2.titan.email
③ And then add a TXT/SPF record by adding the below mentioned values:
Record Type: TXT
Host Record: @
TTL: 3600
Record Value: v=spf1 include:spf.titan.email ~all
▲Please note that DNS propagation can take up to 6 hours. Hence after adding the above records you may need to wait for 6 hours before you can start using the Titan email services.
Once the DNS records are configured, you're all set to send and receive emails from your domain using Titan Mail!
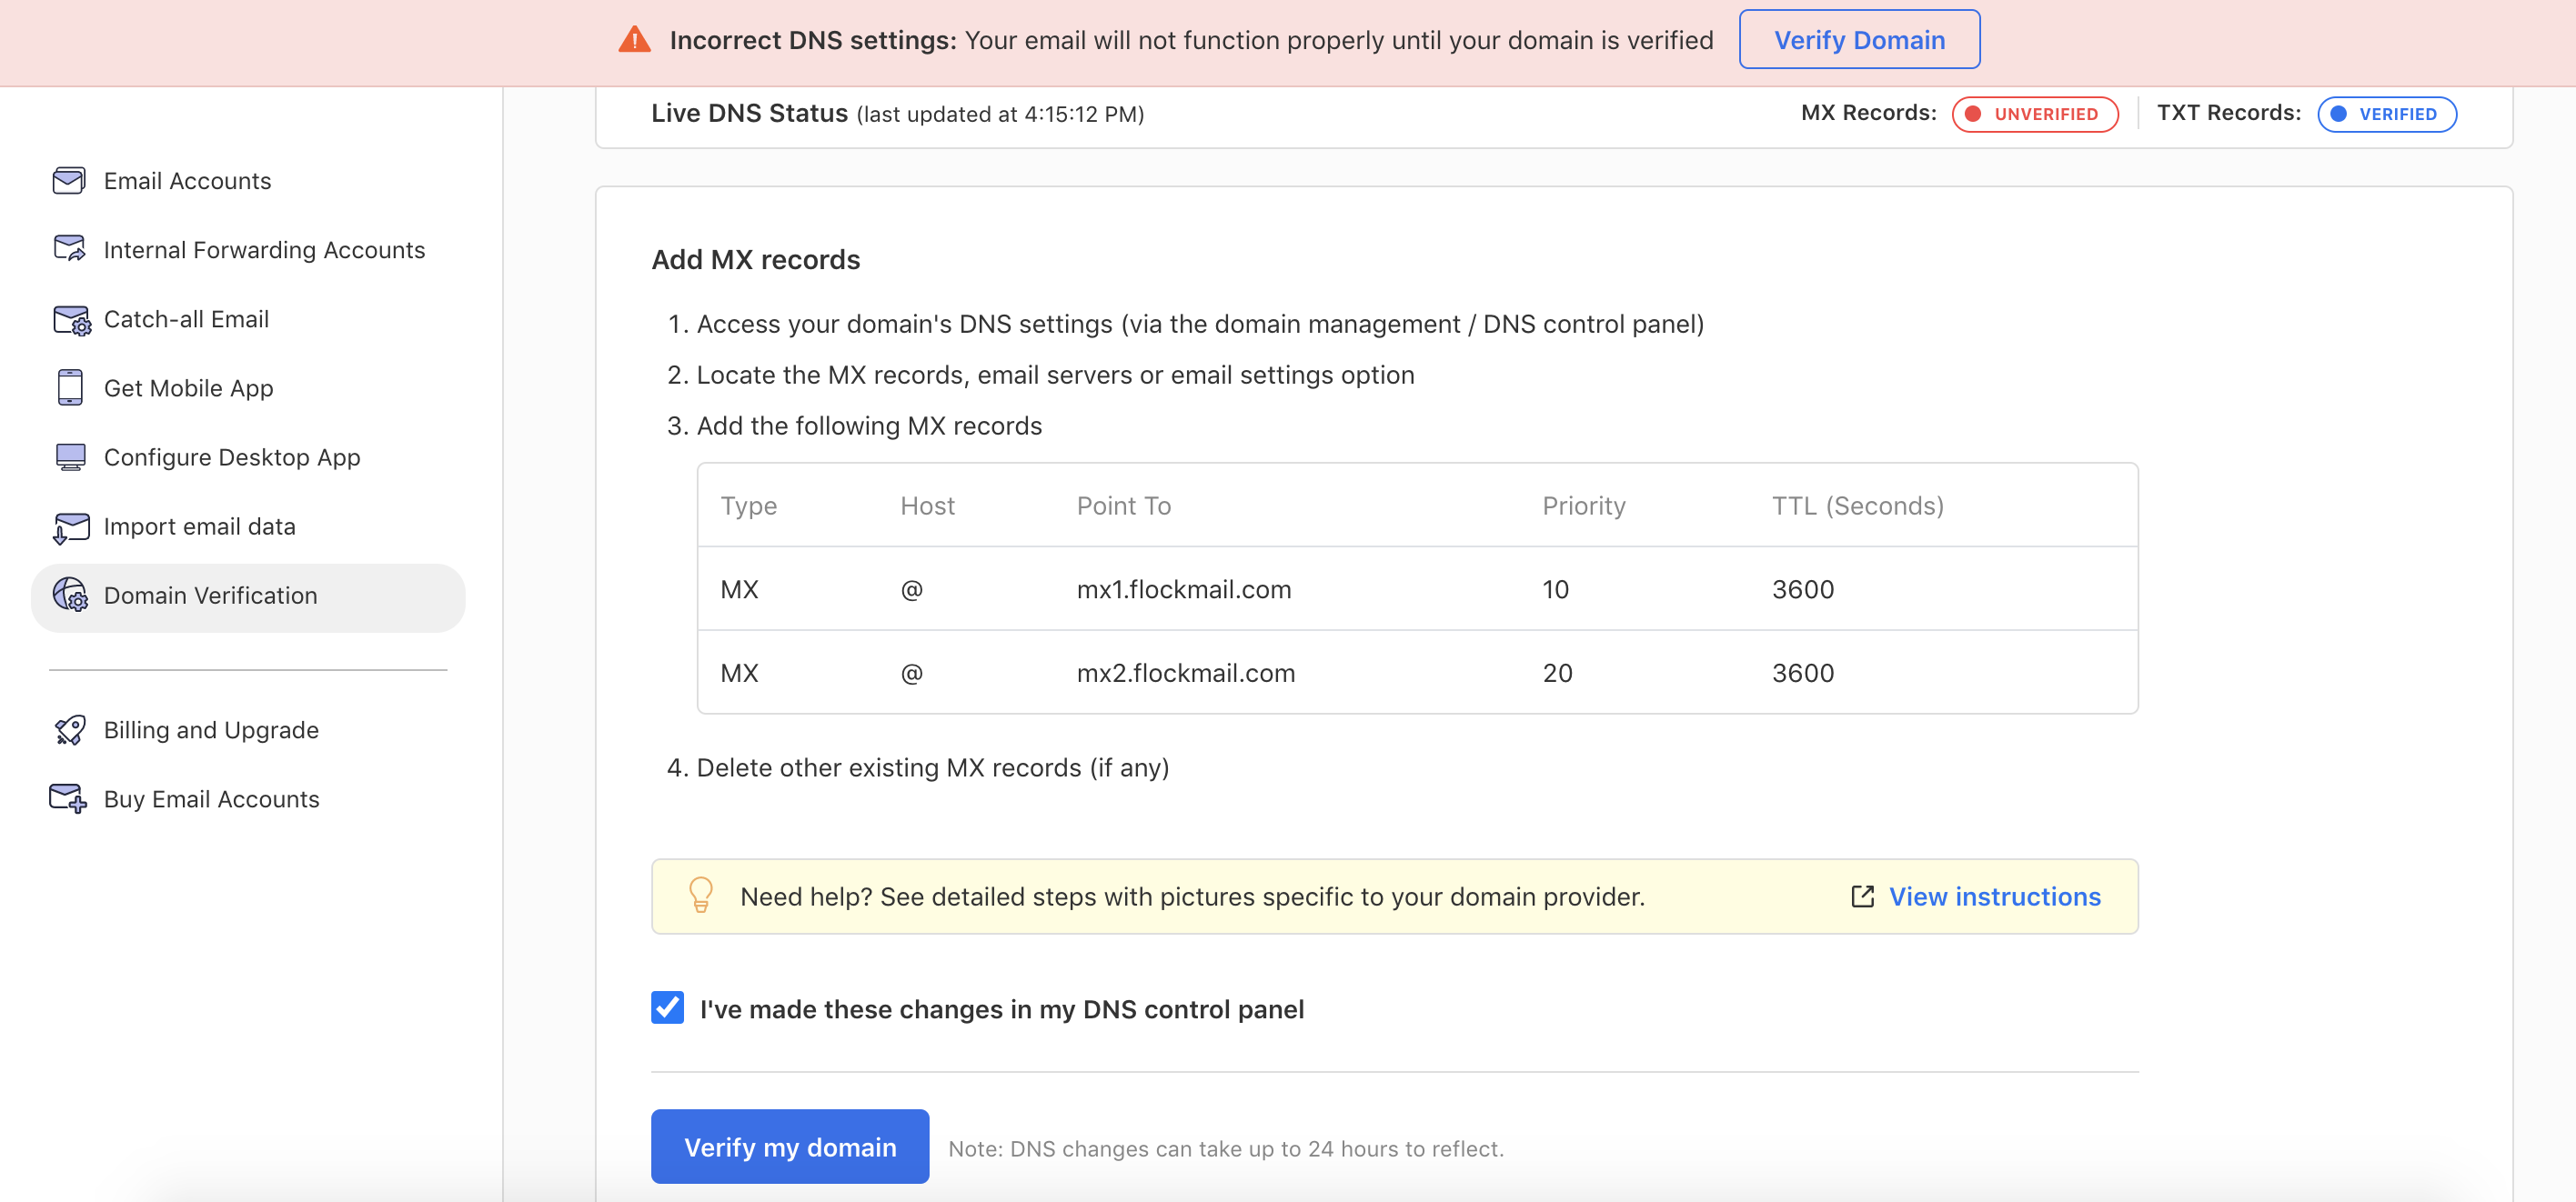
Follow these steps to ensure that domain verification is completed:
1. In the Enterprise Email view, locate and click the Webmail button to access the Titan Email Admin Control Panel
2. Under Domain verification, click on Verify Domain and re-try sending an email.
Step 2: Create Your Email Addresses
Now it is time to set up your actual email mailboxes (e.g., [email protected], [email protected]). Each email account you purchase allows you to set up one active email address.
To create your first email address:
1. In the Enterprise Email view, locate and click the Webmail button to access the Titan Email Admin Control Panel
2. Click on Email Accounts and follow the on-screen instructions to create your email addresses
3. For detailed instructions, refer to Titan's official guide: Create Email Accounts via Email Control Panel
Tip: You can always purchase additional email accounts through NameMart if you need to expand your team.
Step 3: Access Your Webmail
Once your email addresses are created, you can access your emails instantly through Titan's webmail interface—no additional software required.
To log in to webmail:
1. Use the Webmail button in your NameMart Member Center, or go directly to: https://app.titan.email/
2. Enter your full email address (e.g., [email protected])
3. Enter the password you set up during account creation
Tip: Send a test email to yourself and reply to it to confirm everything is working correctly.
Step 4: Set Up Titan Email on Your Devices
You can access your Titan Email in multiple ways beyond webmail:
Option A: Use the Titan Mobile App (Recommended)
Titan offers official native mobile apps for both iOS and Android:
iOS: Download from the Apple App Store (search "Titan Email")
Android: Download from the Google Play Store (search "Titan Email")
Option B: Enable Titan on other apps
Titan Email works with popular email clients such as Microsoft Outlook, Apple Mail, Gmail (web app), Thunderbird, and others. For detailed instructions, refer to Titan's official guide: Enable Titan on other apps
Troubleshooting Common Issues
1. Cannot send or receive emails
DNS records may not have propagated yet. Wait 24–72 hours. Verify your MX records are correctly configured.
2. Incorrect password error
Reset your password in the Titan Email Manager and update it in your email client.
3. SMTP authentication failed
Enable SMTP authentication and use the same login details as your incoming server.
4. Email client cannot find server
Double-check that you are using the correct server settings: imap.titan.email and smtp.titan.email.
Need Additional Help?
If you encounter any issues that are not addressed in this guide, NameMart's support team is ready to assist you. You can also refer to Titan's official support resources:
Titan Email Support: https://support.titan.email/
Titan Webmail Login: https://app.titan.email/